Growing guava from seed is a rewarding experience that allows you to cultivate this tropical fruit tree from scratch. With the right conditions and care, you can enjoy the sweet and juicy fruits of your own guava tree.
Selecting and Preparing Guava Seeds
To begin, choose ripe guavas from a reputable source. Look for fruits that are firm, evenly colored, and free from blemishes. Avoid guavas that are overly soft or have signs of decay, as these may harbor fungal diseases. Once you have selected your guavas, it’s time to extract the seeds. Cut the fruit in half and scoop out the pulp, taking care not to damage the seeds.
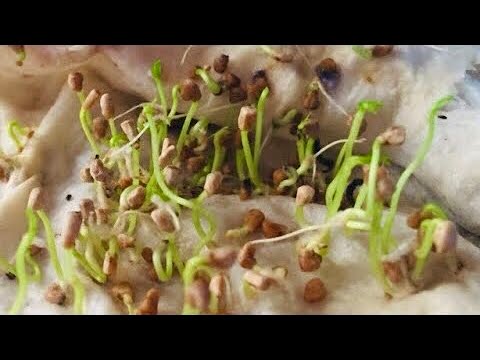
The seeds of a guava are small, brown, and encased in a gelatinous pulp. To remove this pulp, gently rub the seeds between your fingers or rinse them under running water. This step is crucial, as the pulp can inhibit germination. After cleaning, spread the seeds on a paper towel or a clean surface to dry. Allow them to air dry for a few hours, or until they are completely dry to the touch.

Once the seeds are scarified, they are ready for planting. Choose a well-draining potting mix or a seed starting tray filled with a sterile seed-starting mix. Make shallow indentations in the soil, about ¼ inch deep, and place one or two seeds in each indentation. Cover the seeds with soil and gently pat it down.
After planting, water the seeds thoroughly, ensuring the soil is moist but not waterlogged. Place the container in a warm, sunny location, ideally with temperatures between 70-80 degrees Fahrenheit. Keep the soil consistently moist, but avoid overwatering, as this can lead to root rot.
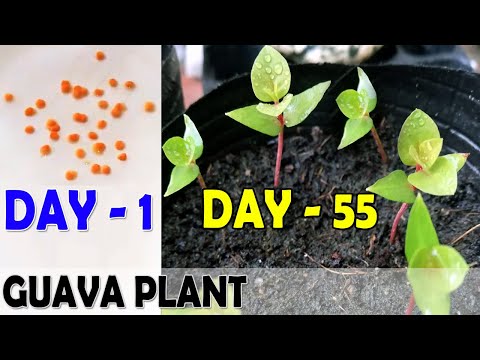
Germination typically takes 2-4 weeks, but it can vary depending on the variety of guava and environmental conditions. Once the seedlings emerge, provide them with adequate sunlight and water. As the seedlings grow, you can gradually acclimate them to outdoor conditions by placing them in a sheltered spot for a few hours each day.
Sowing Guava Seeds: The Right Way
- First, select ripe, healthy guavas for seed extraction. The best time to harvest guavas for seed collection is when they are fully ripe, exhibiting a vibrant color and a soft texture. Once you have your guavas, carefully cut them open and scoop out the seeds. Rinse the seeds thoroughly under running water to remove any pulp or debris. This step is crucial to prevent fungal growth and ensure healthy seed development.
- After cleaning, allow the seeds to air dry for a few hours. This drying process helps to harden the seed coat, promoting better germination. Once the seeds are dry, you can begin the sowing process. Choose a well-draining potting mix, preferably one specifically designed for seedlings. Fill a seed tray or small pots with the potting mix, leaving about an inch of space at the top.
- Now, it’s time to sow the seeds. Gently press each seed about half an inch deep into the potting mix, spacing them a few inches apart. After sowing, lightly cover the seeds with the potting mix and water them thoroughly. Ensure the potting mix remains moist but not waterlogged. To maintain optimal humidity levels, you can cover the seed tray or pots with a plastic wrap or dome.
- Place the seed tray or pots in a warm, sunny location, ideally with temperatures ranging from 70 to 80 degrees Fahrenheit. Guava seeds typically take 2 to 4 weeks to germinate, but this can vary depending on the seed quality and environmental conditions. During this period, maintain consistent moisture levels and ensure the potting mix doesn’t dry out completely.
- Once the seedlings emerge, remove the plastic wrap or dome to allow for proper air circulation. As the seedlings grow, you can gradually acclimate them to direct sunlight. When the seedlings have developed a few true leaves, you can transplant them into larger pots or directly into the garden.
- When transplanting, choose a sunny location with well-drained soil. Guava trees prefer slightly acidic soil with a pH range of 6.0 to 6.5. Water the newly transplanted seedlings regularly, especially during the first few weeks. As the trees mature, they will require less frequent watering.
Caring for Guava Seedlings: From Sprout to Transplant
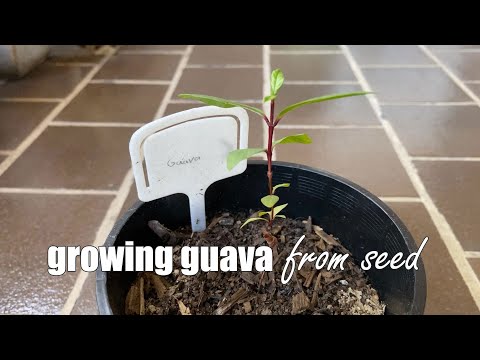
Guava seedlings, once they emerge from the soil, require attentive care to ensure their healthy growth and eventual transition to a thriving fruit-bearing tree. The journey from sprout to transplant is a crucial stage in the guava’s life cycle, demanding consistent attention to their needs.
Firstly, it’s essential to provide the seedlings with adequate sunlight. Guava trees are sun-loving plants, and their seedlings need at least six hours of direct sunlight daily. This can be achieved by placing them in a sunny location outdoors or by using grow lights indoors. Insufficient sunlight can lead to weak, leggy growth, hindering the seedling’s development.
Secondly, maintaining consistent moisture is vital for the young guava seedlings. The soil should be kept moist but not waterlogged. Overwatering can lead to root rot, while underwatering can cause wilting and stunted growth. It’s best to water the seedlings when the top inch of soil feels dry to the touch.
Thirdly, providing the seedlings with adequate nutrients is crucial for their growth. Guava seedlings benefit from regular fertilization with a balanced fertilizer, such as a 10-10-10 formula. This can be applied every two to four weeks, depending on the growth rate of the seedlings. However, it’s important to avoid over-fertilizing, as this can damage the roots.
As the seedlings grow, they will need to be thinned out. This process involves removing weaker seedlings to allow the stronger ones to thrive. Thinning helps to ensure that the remaining seedlings have enough space to grow and develop a strong root system.
Once the guava seedlings have reached a height of about six inches, they can be transplanted into larger pots or directly into the ground. Before transplanting, it’s important to harden off the seedlings by gradually exposing them to outdoor conditions. This process helps them acclimate to the changes in temperature, humidity, and sunlight.
When transplanting, it’s crucial to handle the seedlings carefully to avoid damaging their roots. The hole for the seedling should be large enough to accommodate the root ball, and the soil should be amended with compost or other organic matter to improve drainage and fertility.
After transplanting, the seedlings will need regular watering and fertilization to help them establish themselves in their new environment. It’s also important to monitor them for pests and diseases, taking appropriate measures to control any problems that arise.
By following these guidelines, you can nurture your guava seedlings from sprouts to healthy, robust transplants, setting the stage for their future growth into productive fruit-bearing trees. The journey from sprout to transplant is a testament to the resilience and adaptability of the guava, a fruit that has been cultivated for centuries and continues to be a valuable source of nutrition and flavor.
Transplanting Guava Seedlings: A Guide to Success
Before transplanting, it’s essential to select the right time. The ideal time for transplanting guava seedlings is during the early morning or late evening when temperatures are cooler. This minimizes stress on the young plants and allows them to acclimate to their new environment more effectively. Additionally, ensure the soil is moist but not waterlogged.
When choosing a location for your guava seedlings, consider their mature size. Guava trees can grow quite large, so select a spot with ample space for their roots to spread and their branches to reach their full potential. Furthermore, guava trees prefer full sun, so choose a location that receives at least six hours of direct sunlight daily.
Once you’ve chosen the ideal location, prepare the planting hole. The hole should be twice as wide and as deep as the root ball of the seedling. This allows for proper root development and prevents root circling, which can hinder growth. Before planting, loosen the soil at the bottom of the hole to encourage drainage.

After planting, water the seedling thoroughly to settle the soil and encourage root establishment. It’s crucial to maintain consistent moisture levels during the first few weeks after transplanting. However, avoid overwatering, as this can lead to root rot.
To protect your young guava seedlings from harsh weather conditions and pests, consider using a protective barrier. A simple mesh cage or a layer of mulch can provide the necessary protection. Mulch also helps retain moisture and suppress weeds.
As your guava seedlings grow, regular fertilization is essential. Use a balanced fertilizer specifically designed for fruit trees, following the manufacturer’s instructions. Avoid over-fertilizing, as this can damage the roots.
Growing Guava Trees from Seed: Tips for Healthy and Fruitful Trees
Growing guava trees from seed is a rewarding experience, offering the satisfaction of nurturing a plant from its very beginning to a fruitful, mature tree. While it may seem daunting, the process is relatively straightforward and can be accomplished with a little patience and the right knowledge. The key to success lies in understanding the specific needs of guava seeds and providing them with the optimal conditions for germination and growth.
- First, you need to source fresh, viable guava seeds. The best way to ensure this is to extract them from ripe, healthy guavas. Once you have the seeds, it’s crucial to prepare them for planting. This involves removing the pulp and gently cleaning the seeds to remove any remaining fruit residue. After cleaning, it’s recommended to soak the seeds in water for 24 hours, which helps soften the seed coat and promotes germination.
- Next, you need to choose the right planting medium. A well-draining potting mix is ideal, as it allows for proper aeration and prevents waterlogging, which can harm the delicate seedlings. Fill a seed tray or small pots with the potting mix and make shallow indentations, about half an inch deep, to accommodate the seeds. Place one seed in each indentation and cover it lightly with the potting mix.
- After planting, it’s essential to maintain a consistently moist environment. Water the seeds regularly, ensuring the soil is evenly damp but not waterlogged. You can cover the seed tray or pots with a plastic wrap or dome to create a humid environment, which helps retain moisture and promotes germination.
- Once the seeds have germinated, typically within a few weeks, you can remove the plastic wrap or dome and gradually acclimate the seedlings to the open air. As the seedlings grow, they will need more space and nutrients. When they reach a height of a few inches, it’s time to transplant them into larger pots or directly into the ground, depending on your climate and space availability.
- When transplanting, it’s crucial to handle the seedlings with care, avoiding damage to their delicate roots. Choose a sunny location with well-drained soil and ensure the transplanted seedlings receive adequate water and nutrients. Regular fertilization with a balanced fertilizer will help promote healthy growth and fruit production.
As the guava tree matures, it will require regular pruning to maintain its shape and encourage fruit production. Pruning involves removing dead, diseased, or crossing branches, as well as shaping the tree to promote a strong, balanced structure. It’s also important to protect the tree from pests and diseases, which can be achieved through regular inspection and appropriate treatment if necessary.
Growing guava trees from seed is a rewarding journey that requires patience and dedication. By following these tips, you can increase your chances of success and enjoy the sweet, juicy fruits of your labor. Remember, each guava tree is unique, and its growth and fruiting patterns may vary depending on the variety, climate, and care it receives. With proper care and attention, your guava tree will thrive and provide you with delicious fruit for years to come.
Q&A
## 5 Questions and Answers about Growing Guava from Seed:
**1. How do I start guava seeds?**
* Remove the seeds from ripe guava fruit and wash them thoroughly. Sow the seeds in a seed tray filled with seed-starting mix, covering them with a thin layer of soil. Keep the soil moist and warm, and the seeds should germinate in 1-2 weeks.
**2. When is the best time to plant guava seeds?**
* Guava seeds can be planted year-round in warm climates. However, it’s best to start them indoors in a seed tray during the cooler months and transplant them outdoors once the weather warms up.
**3. How long does it take for a guava tree to produce fruit?**
* Guava trees typically take 2-3 years to start producing fruit, but some varieties may take longer.
**4. What kind of soil do guava trees need?**
* Guava trees prefer well-drained, slightly acidic soil with a pH of 6.0-6.5. They also need plenty of sunlight and regular watering.
**5. How do I care for a young guava tree?**
* Water young guava trees regularly, especially during dry periods. Fertilize them with a balanced fertilizer every few months. Prune them regularly to encourage branching and fruit production.