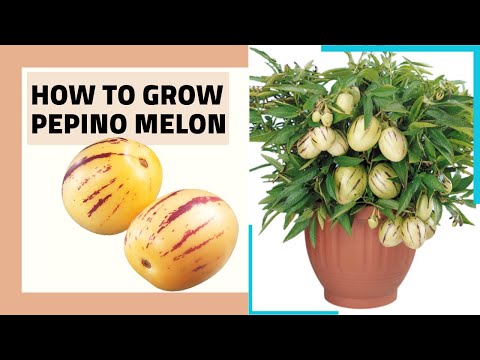
Getting to Know the Pepino Melon
Before we get our hands dirty, let’s talk about what makes the pepino melon so special. Have you ever seen a fruit that looks like a melon but tastes like a mix between a cucumber and a honeydew? That’s the pepino for you! It’s a true conversation starter at farmers’ markets, I tell you.
Native to the Andean valleys of South America, this quirky fruit has been cultivated for centuries. Can you believe it’s actually part of the nightshade family, related to tomatoes and eggplants? Nature sure has a sense of humor!
Now, you might be wondering, “Michael, why should I bother growing these odd little fruits?” Well, let me tell you, once you’ve tasted a perfectly ripe pepino melon, there’s no going back. They’re refreshing, sweet, and have a complexity of flavor that’ll make your taste buds dance. Plus, they’re packed with vitamins C and B, making them as nutritious as they are delicious.
But here’s the kicker – growing pepino melons from seeds is like embarking on a thrilling adventure. It’s not always easy, but the journey is so rewarding. Are you ready to take the plunge with me?
Preparing for Your Pepino Paradise
Alright, let’s roll up our sleeves and get to the nitty-gritty of pepino melon cultivation. First things first, you’ll need to gather your supplies. Here’s what you’ll need:
- Pepino melon seeds (obviously!)
- Well-draining potting soil
- Small pots or seed trays
- A warm, sunny spot (or grow lights if you’re not blessed with ample sunshine)
- Patience (trust me, you’ll need it!)
Now, here’s a little secret I’ve learned over the years: pepino melon seeds can be a bit finicky. They’re like those high-maintenance friends who need everything just right. But don’t worry, I’ve got your back!
Start by soaking your seeds in lukewarm water overnight. This little spa treatment helps kickstart the germination process. Then, fill your pots or seed trays with that well-draining potting soil. Pepino melons hate wet feet, so good drainage is crucial.
Plant the seeds about a quarter-inch deep and keep the soil moist but not waterlogged. Think of it as a delicate balance – you want to give them a drink, not drown them in kindness.
The Waiting Game: From Seeds to Seedlings
Now comes the part that tests even the most patient farmers – waiting for those little green heads to pop up. Pepino melon seeds typically take anywhere from 10 to 20 days to germinate. During this time, you might find yourself talking to the soil, urging those seeds to grow. Don’t worry; I won’t judge. I’ve been known to sing lullabies to my seedlings!
Keep your seed trays in a warm spot, ideally around 70-80°F (21-27°C). If you’re starting your seeds indoors (which I recommend unless you live in a tropical paradise), you might want to invest in a heat mat. Think of it as a cozy electric blanket for your future fruits.

As your seedlings grow, you’ll need to thin them out. I know, I know, it feels cruel, but trust me, it’s for the greater good. Keep the strongest seedlings and gently remove the others. Think of it as survival of the fittest, pepino style.
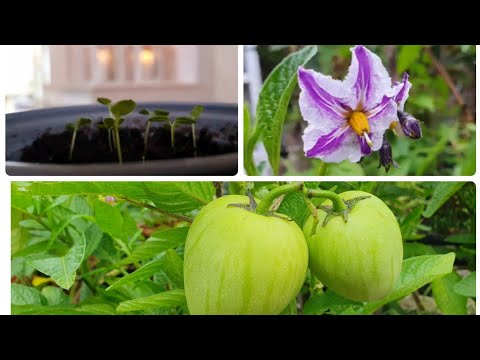
Transplanting: The Big Move
When your seedlings have grown to about 4-6 inches tall and have a few sets of true leaves, it’s time for the big move. This is where things get real, folks. Your pepino melons are ready to spread their roots and reach for the sky!
- Choose a spot in your garden that gets plenty of sun – these guys love basking in those rays. If you’re in a cooler climate like me, consider planting them near a south-facing wall. It’s like creating a little tropical microclimate in your backyard.
- Prepare the soil by mixing in some compost or well-rotted manure. Pepino melons are hungry plants, and they’ll thank you for the extra nutrients by producing juicier, tastier fruits. Spacing is key here – give each plant about 3 feet of space to sprawl out. Trust me, they’ll use it!
- When transplanting, be gentle with those delicate roots. I like to water the seedlings well before moving them, then carefully ease them out of their pots. Plant them at the same depth they were growing in their containers, and water them in well.
Now, here’s a pro tip: mulch around your plants. It helps retain moisture, suppress weeds, and keeps the fruits clean as they develop. I like to use straw, but you can use whatever organic mulch you have on hand.
Nurturing Your Pepino Patch
Congratulations! You’ve officially become a pepino melon parent. But your work isn’t over yet. These exotic beauties need ongoing care to thrive and produce those delectable fruits we’re all dreaming about.
Watering is crucial, but remember what I said about wet feet? Aim for consistent moisture without waterlogging. I like to water deeply once or twice a week, depending on the weather. Stick your finger in the soil – if it’s dry up to your first knuckle, it’s time to water.
Fertilize your plants every few weeks with a balanced, organic fertilizer. I use a compost tea that I brew myself – it’s like a smoothie for plants, packed with all the good stuff they need to grow strong and healthy.
As your plants grow, you might need to provide some support. Pepino melons can get a bit unruly, like teenagers at a rock concert. I use trellises or stakes to keep them upright and prevent the fruits from sitting on the ground.
Keep an eye out for pests and diseases. Aphids and whiteflies can be a nuisance, but a strong jet of water usually does the trick. If you spot any diseased leaves, remove them promptly to prevent spread. Remember, a healthy plant is a happy plant!
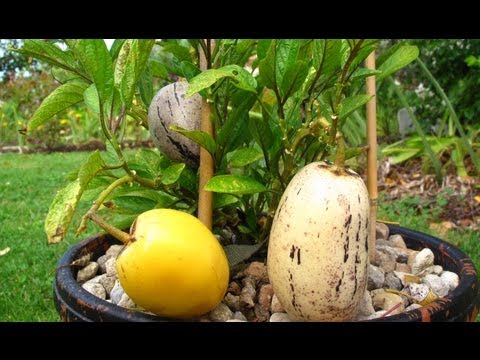
The Sweet Reward: Harvesting Your Pepino Melons
After months of care and anticipation, the moment you’ve been waiting for is finally here – harvest time! But how do you know when your pepino melons are ready to pick? It’s all about the color and feel.
Ripe pepino melons will have a creamy yellow background with purple stripes. Give them a gentle squeeze – if they yield slightly to pressure, they’re good to go. If they’re rock hard, give them a few more days. And if they’re too soft? Well, you’ve waited a tad too long, but they’ll still taste great in a smoothie!
Use scissors or pruning shears to cut the fruit from the vine, leaving a small piece of stem attached. This helps the fruit last longer after picking. And here’s a little secret – pepino melons will continue to ripen after harvesting, so don’t be afraid to pick them a little early if frost is threatening.
Now comes the best part – tasting your homegrown pepino melons! Slice one open, take a bite, and let that unique flavor wash over you. It’s a moment of pure joy, the culmination of all your hard work and patience. Trust me, there’s nothing quite like it in the world of gardening.
Wrapping Up: The Pepino Melon Adventure
Well, folks, we’ve come to the end of our pepino melon journey. From tiny seeds to juicy fruits, it’s been quite the ride, hasn’t it? Growing these exotic fruits might seem daunting at first, but with a little patience and TLC, you’ll be enjoying your very own pepino melons in no time.
Remember, gardening is all about learning and experimenting. Don’t be discouraged if your first attempt isn’t perfect. Each season brings new lessons and opportunities to improve. And who knows? You might just become the neighborhood pepino melon expert!
So, what are you waiting for? Grab those seeds, get your hands dirty, and embark on your own pepino melon adventure. Trust me, the sweet reward at the end is worth every minute of care and attention.
Happy growing, and may your garden always be filled with the sweet aroma of ripening pepino melons!